Using Git folders with Databricks extension for Visual Studio Code
Note
Databricks recommends using workspace files when configuring the Databricks extension for Visual Studio Code.
This documentation has been retired and might not be updated. The products, services, or technologies mentioned in this content are no longer supported. Documentation provided here only covers the specifics of configuring Git folders for Databricks extension for Visual Studio Code. For complete documentation, see Databricks extension for Visual Studio Code.
The Databricks extension for Visual Studio Code supports working with files in Databricks Git folders within the Databricks workspace. Databircks Git folders was the default sync before version 0.3.15, but is no longer recommended.
Files in Git folders is enabled by default in all Databricks workspaces, but can be disabled by admins using the REST API. Contact your workspace administrator if you cannot access this functionality.
Important
The Databricks extension for Visual Studio Code works only with repositories that it creates. You must have execute permissions for a Databricks cluster for running code, as well as permissions to create a repository in Databricks Git folders.
Set the repository
If you choose to use a Databricks Git folder instead of a workspace directory in your Databricks workspace, then with the extension and your code project opened, and a Databricks configuration profile already set, use the Databricks extension for Visual Studio Code to create a new repository in Databricks Git folders and use it, or select an existing repository in Databricks Git folders that you created earlier with the Databricks extension for Visual Studio Code and want to reuse instead.
Note
The Databricks extension for Visual Studio Code works only with repositories that it creates. You cannot use an existing repository in your workspace.
To enable the Databricks extension for Visual Studio Code to use repositories in Databricks Git folders within a Databricks workspace, you must first set the extension’s Sync: Destination Type setting to repo as follows:
With the extension and your code project opened, and a Databricks configuration profile already set, in the Command Palette (View > Command Palette), type
Preferences: Open User Settings, and then click Preferences: Open User Settings.On the User tab, expand Extensions, and click Databricks.
For Sync: Destination Type, select repo.
Quit and restart Visual Studio Code.
Create a new repo
To create a new repository, do the following:
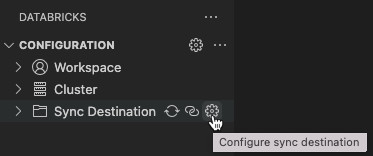
In the Configuration pane, next to Sync Destination, click the gear (Configure sync destination) icon.
In the Command Palette, click Create New Sync Destination.
Type a name for the new repository in Databricks Git folders, and then press Enter.
The extension appends the characters
.ideto the end of the repo’s name and then adds the repo’s workspace path to the code project’s.databricks/project.jsonfile, for example"workspacePath": "/Workspace/Repos/someone@example.com/my-repo.ide".Note
If the remote repo’s name does not match your local code project’s name, a warning icon appears with this message: The remote sync destination name does not match the current Visual Studio Code workspace name. You can ignore this warning if you do not require the names to match.
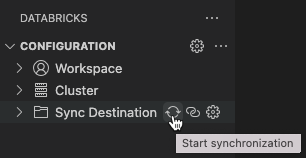
After you set the repository, begin synchronizing with the repository by clicking the arrowed circle (Start synchronization) icon next to Sync Destination.
Important
The Databricks extension for Visual Studio Code only performs one-way, automatic synchronization of file changes from your local Visual Studio Code project to the related repository in your remote Databricks workspace. These remote repository files are intended to be transient. Do not initiate changes to these files from within your remote repository, as these changes will not be synchronized back to your local project.
Reuse an existing repo
If you have an existing repository in Databricks Git folders that you created earlier with the Databricks extension for Visual Studio Code and want to reuse in your current Visual Studio Code project, then do the following:
In the Configuration pane, next to Sync Destination, click the gear (Configure sync destination) icon.
In the Command Palette, select the repository’s name from the list.
The extension adds the repo’s workspace path to the code project’s
.databricks/project.jsonfile, for example"workspacePath": "/Workspace/Repos/someone@example.com/my-repo.ide".Note
If the remote repo’s name does not match your local code project’s name, a warning icon appears with this message: The remote sync destination name does not match the current Visual Studio Code workspace name. You can ignore this warning if you do not require the names to match.
After you set the repository, begin synchronizing with the repository by clicking the arrowed circle (Start synchronization) icon next to Sync Destination.
Important
The Databricks extension for Visual Studio Code only performs one-way, automatic synchronization of file changes from your local Visual Studio Code project to the related repository in your remote Databricks workspace. These remote repository files are intended to be transient. Do not initiate changes to these files from within your remote repository, as these changes will not be synchronized back to your local project.