Authenticate access to Databricks with a service principal using OAuth (OAuth M2M)
This article explains how to create a Databricks service principal and use it to authenticate to a target entity with OAuth.
Step 1: Create a service principal
Account admins and workspace admins can create an service principals. This step describes creating a service principal in a workspace. To use the account console, see Manage service principals in your account.
As a workspace admin, log in to the Databricks workspace.
Click your username in the top bar of the Databricks workspace and select Settings.
Click on the Identity and access tab.
Next to Service principals, click Manage.
Click Add service principal.
Click the drop-down arrow in the search box and then click Add new.
Enter a name for the service principal.
Click Add.
The service principal is added to both your workspace and the Databricks account.
Step 2: Assign permissions to your service principal
Click the name of your service principal to open its details page.
On the Configurations tab, check the box next to each entitlement that you want your service principal to have for this workspace, and then click Update.
On the Permissions tab, grant access to any Databricks users, service principals, and groups that you want to manage and use this service principal. See Manage roles on a service principal.
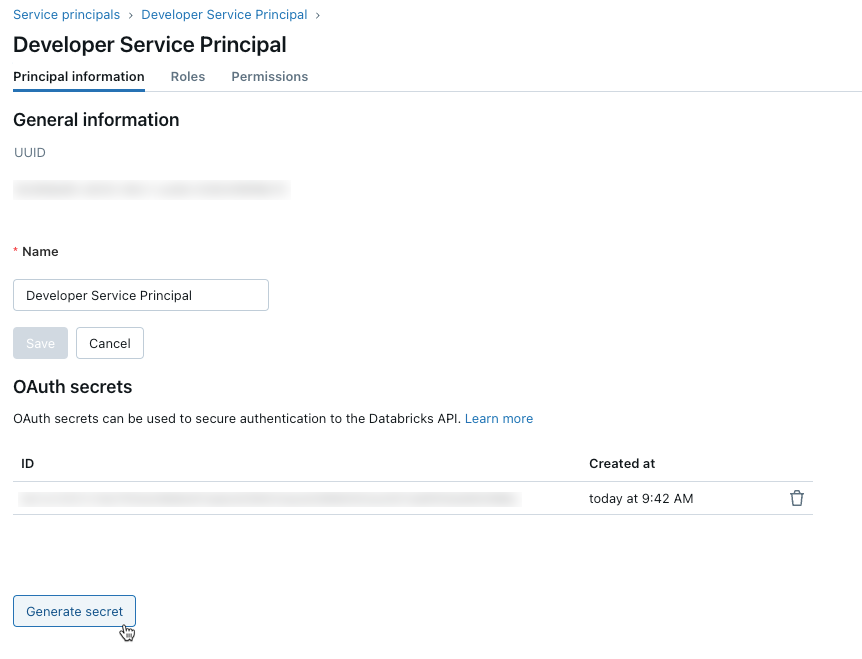
Step 3: Create an OAuth secret for a service principal
Before you can use OAuth to authenticate to Databricks, you must first create an OAuth secret, which can be used to generate OAuth access tokens. A service principal can have up to five OAuth secrets. Account admins and workspace admins can create an OAuth secret for a service principal.
On your service principal’s details page click the Secrets tab.
Under OAuth secrets, click Generate secret.

Copy the displayed Secret and Client ID, and then click Done.
The secret will only be revealed once during creation. The client ID is the same as the service principal’s application ID.
Account admins can also generate an OAuth secret from the service principal details page in the account console.
As an account admin, log in to the account console.
Click
 User management.
On the Service principals tab, select your service principal.
Under OAuth secrets, click Generate secret.
Copy the displayed Secret and Client ID, and then click Done.
Note
To enable the service principal to use clusters or SQL warehouses, you must give the service principal access to them. See Compute permissions or Manage a SQL warehouse.
Step 4: Use OAuth M2M authentication
To use OAuth M2M authentication, you must set the following associated environment variables, .databrickscfg fields, Terraform fields, or Config fields:
The Databricks host, specified as
https://accounts.gcp.databricks.comfor account operations or the target workspace URL, for examplehttps://1234567890123456.7.gcp.databricks.comfor workspace operations.The Databricks account ID, for Databricks account operations.
The service principal client ID.
The service principal secret.
To perform OAuth M2M authentication, integrate the following within your code, based on the participating tool or SDK:
To use environment variables for a specific Databricks authentication type with a tool or SDK, see Authenticate access to Databricks resources or the tool’s or SDK’s documentation. See also Environment variables and fields for client unified authentication and the Default methods for client unified authentication.
For account-level operations, set the following environment variables:
DATABRICKS_HOST, set to the Databricks account console URL,https://accounts.gcp.databricks.com.DATABRICKS_ACCOUNT_IDDATABRICKS_CLIENT_IDDATABRICKS_CLIENT_SECRET
For workspace-level operations, set the following environment variables:
DATABRICKS_HOST, set to the Databricks workspace URL, for examplehttps://1234567890123456.7.gcp.databricks.com.DATABRICKS_CLIENT_IDDATABRICKS_CLIENT_SECRET
Create or identify a Databricks configuration profile with the following fields in your .databrickscfg file. If you create the profile, replace the placeholders with the appropriate values. To use the profile with a tool or SDK, see Authenticate access to Databricks resources or the tool’s or SDK’s documentation. See also Environment variables and fields for client unified authentication and the Default methods for client unified authentication.
For account-level operations, set the following values in your .databrickscfg file. In this case, the Databricks account console URL is https://accounts.gcp.databricks.com:
[<some-unique-configuration-profile-name>]
host          = <account-console-url>
account_id    = <account-id>
client_id     = <service-principal-client-id>
client_secret = <service-principal-secret>
For workspace-level operations, set the following values in your .databrickscfg file. In this case, the host is the Databricks workspace URL, for example https://1234567890123456.7.gcp.databricks.com:
[<some-unique-configuration-profile-name>]
host          = <workspace-url>
client_id     = <service-principal-client-id>
client_secret = <service-principal-secret>
For the Databricks CLI, do one of the following:
Set the environment variables as specified in this article’s “Environment” section.
Set the values in your
.databrickscfgfile as specified in this article’s “Profile” section.
Environment variables always take precedence over values in your .databrickscfg file.
Note
OAuth M2M authentication is supported on Databricks Connect for Python and Scala for Databricks Runtime 13.3 LTS and above.
For Databricks Connect, you can do one of the following:
Set the values in your
.databrickscfgfile for Databricks workspace-level operations as specified in this article’s “Profile” section. Also set thecluster_idenvironment variable in your profile to your workspace instance URL, for examplehttps://1234567890123456.7.gcp.databricks.com.Set the environment variables for Databricks workspace-level operations as specified in this article’s “Environment” section. Also set the
DATABRICKS_CLUSTER_IDenvironment variable to your workspace instance URL, for examplehttps://1234567890123456.7.gcp.databricks.com.
Values in your .databrickscfg file always take precedence over environment variables.
To initialize the Databricks Connect client with these environment variables or values in your .databrickscfg file, see Compute configuration for Databricks Connect.
For the Databricks extension for Visual Studio Code, do the following:
Set the values in your
.databrickscfgfile for Databricks workspace-level operations as specified in this article’s “Profile” section.In the Configuration pane of the Databricks extension for Visual Studio Code, click Configure Databricks.
In the Command Palette, for Databricks Host, enter your workspace URL, for example
https://1234567890123456.7.gcp.databricks.com, and then pressEnter.In the Command Palette, select your target profile’s name in the list for your URL.
For more details, see Authentication setup for the Databricks extension for Visual Studio Code.
For account-level operations, for default authentication:
provider "databricks" {
  alias = "accounts"
}
For direct configuration (replace the retrieve placeholders with your own implementation to retrieve the values from the console or some other configuration store, such as HashiCorp Vault. See also Vault Provider). In this case, the Databricks account console URL is https://accounts.gcp.databricks.com:
provider "databricks" {
  alias         = "accounts"
  host          = <retrieve-account-console-url>
  account_id    = <retrieve-account-id>
  client_id     = <retrieve-client-id>
  client_secret = <retrieve-client-secret>
}
For workspace-level operations, for default authentication:
provider "databricks" {
  alias = "workspace"
}
For direct configuration (replace the retrieve placeholders with your own implementation to retrieve the values from the console or some other configuration store, such as HashiCorp Vault. See also Vault Provider). In this case, the host is the Databricks workspace URL, for example https://1234567890123456.7.gcp.databricks.com:
provider "databricks" {
  alias         = "workspace"
  host          = <retrieve-workspace-url>
  client_id     = <retrieve-client-id>
  client_secret = <retrieve-client-secret>
}
For more information about authenticating with the Databricks Terraform provider, see Authentication.
For account-level operations, use the following for default authentication:
from databricks.sdk import AccountClient

a = AccountClient()
# ...
For direct configuration, use the following, replacing the retrieve placeholders with your own implementation, to retrieve the values from the console or other configuration store, such as Google Cloud Secret Manager. In this case, the Databricks account console URL is https://accounts.gcp.databricks.com:
from databricks.sdk import AccountClient

a = AccountClient(
  host          = retrieve_account_console_url(),
  account_id    = retrieve_account_id(),
  client_id     = retrieve_client_id(),
  client_secret = retrieve_client_secret()
)
# ...
For workspace-level operations, specifically default authentication:
from databricks.sdk import WorkspaceClient

w = WorkspaceClient()
# ...
For direct configuration, replace the retrieve placeholders with your own implementation to retrieve the values from the console, or other configuration store, such as Google Cloud Secret Manager. In this case, the host is the Databricks workspace URL, for example https://1234567890123456.7.gcp.databricks.com:
from databricks.sdk import WorkspaceClient

w = WorkspaceClient(
  host          = retrieve_workspace_url(),
  client_id     = retrieve_client_id(),
  client_secret = retrieve_client_secret()
)
# ...
For more information about authenticating with Databricks tools and SDKs that use Python and that implement Databricks client unified authentication, see:
For account-level operations, for default authentication:
import com.databricks.sdk.AccountClient;
// ...
AccountClient a = new AccountClient();
// ...
For direct configuration (replace the retrieve placeholders with your own implementation to retrieve the values from the console, or other configuration store, such as Google Cloud Secret Manager). In this case, the Databricks account console URL is https://accounts.gcp.databricks.com:
import com.databricks.sdk.AccountClient;
import com.databricks.sdk.core.DatabricksConfig;
// ...
DatabricksConfig cfg = new DatabricksConfig()
  .setHost(retrieveAccountConsoleUrl())
  .setAccountId(retrieveAccountId())
  .setClientId(retrieveClientId())
  .setClientSecret(retrieveClientSecret());
AccountClient a = new AccountClient(cfg);
// ...
For workspace-level operations, for default authentication:
import com.databricks.sdk.WorkspaceClient;
// ...
WorkspaceClient w = new WorkspaceClient();
// ...
For direct configuration (replace the retrieve placeholders with your own implementation to retrieve the values from the console, or other configuration store, such as Google Cloud Secret Manager). In this case, the host is the Databricks workspace URL, for example https://1234567890123456.7.gcp.databricks.com:
import com.databricks.sdk.WorkspaceClient;
import com.databricks.sdk.core.DatabricksConfig;
// ...
DatabricksConfig cfg = new DatabricksConfig()
  .setHost(retrieveWorkspaceUrl())
  .setClientId(retrieveClientId())
  .setClientSecret(retrieveClientSecret());
WorkspaceClient w = new WorkspaceClient(cfg);
// ...
For more information about authenticating with Databricks tools and SDKs that use Java and implement Databricks client unified authentication, see:
Set up the Databricks Connect client for Scala (the Databricks Connect client for Scala uses the included Databricks SDK for Java for authentication)
Authenticate the Databricks SDK for Java with your Databricks account or workspace
For account-level operations, for default authentication:
import (
"github.com/databricks/databricks-sdk-go"
)
// ...
w := databricks.Must(databricks.NewWorkspaceClient())
// ...
For direct configuration (replace the retrieve placeholders with your own implementation to retrieve the values from the console, or other configuration store, such as Google Cloud Secret Manager). In this case, the Databricks account console URL is https://accounts.gcp.databricks.com:
import (
"github.com/databricks/databricks-sdk-go"
)
// ...
w := databricks.Must(databricks.NewWorkspaceClient(&databricks.Config{
  Host:         retrieveAccountConsoleUrl(),
  AccountId:    retrieveAccountId(),
  ClientId:     retrieveClientId(),
  ClientSecret: retrieveClientSecret(),
}))
// ...
For workspace-level operations, for default authentication:
import (
"github.com/databricks/databricks-sdk-go"
)
// ...
a := databricks.Must(databricks.NewAccountClient())
// ...
For direct configuration (replace the retrieve placeholders with your own implementation to retrieve the values from the console, or other configuration store, such as Google Cloud Secret Manager). In this case, the host is the Databricks workspace URL, for example https://1234567890123456.7.gcp.databricks.com:
import (
"github.com/databricks/databricks-sdk-go"
)
// ...
a := databricks.Must(databricks.NewAccountClient(&databricks.Config{
  Host:         retrieveWorkspaceUrl(),
  ClientId:     retrieveClientId(),
  ClientSecret: retrieveClientSecret(),
}))
// ...
For more information about authenticating with Databricks tools and SDKs that use Go and that implement Databricks client unified authentication, see Authenticate the Databricks SDK for Go with your Databricks account or workspace.
Manually generate and use access tokens for OAuth M2M authentication
Databricks tools and SDKs that implement the Databricks client unified authentication standard will automatically generate, refresh, and use Databricks OAuth access tokens on your behalf as needed for OAuth M2M authentication.
Databricks recommends using client unified authentication, however if you must manually generate, refresh, or use Databricks OAuth access tokens, follow the instructions in this section.
Use the service principal’s client ID and OAuth secret to request an OAuth access token to authenticate to both account-level REST APIs and workspace-level REST APIs. The access token will expire in one hour. You must request a new OAuth access token after the expiration. The scope of the OAuth access token depends on the level that you create the token from. You can create a token at either the account level or the workspace level, as follows:
To call account-level and workspace-level REST APIs within accounts and workspaces that the service principal has access to, manually generate an access token at the account level.
To call REST APIs within only one of the workspaces that the service principal has access to, manually generate an access token at the workspace level for only that workspace.
Manually generate an account-level access token
An OAuth access token created from the account level can be used against Databricks REST APIs in the account, and in any workspaces the service principal has access to.
As an account admin, log in to the account console.
Click the down arrow next to your username in the upper right corner.
Copy your Account ID.
Construct the token endpoint URL by replacing
<my-account-id>in the following URL with the account ID that you copied.https://accounts.gcp.databricks.com/oidc/accounts/<my-account-id>/v1/token
Use a client such as
curlto request an OAuth access token with the token endpoint URL, the service principal’s client ID (also known as an application ID), and the service principal’s OAuth secret you created. Theall-apisscope requests an OAuth access token that can be used to access all Databricks REST APIs that the service principal has been granted access to.Replace
<token-endpoint-URL>with the preceding token endpoint URL.Replace
<client-id>with the service principal’s client ID, which is also known as an application ID.Replace
<client-secret>with the service principal’s OAuth secret that you created.
export CLIENT_ID=<client-id>
export CLIENT_SECRET=<client-secret>

curl --request POST \
--url <token-endpoint-URL> \
--user "$CLIENT_ID:$CLIENT_SECRET" \
--data 'grant_type=client_credentials&scope=all-apis'
This generates a response similar to:
{
  "access_token": "eyJraWQiOiJkYTA4ZTVjZ…",
  "token_type": "Bearer",
  "expires_in": 3600
}
Copy the
access_tokenfrom the response.
Manually generate a workspace-level access token
An OAuth access token created from the workspace level can only access REST APIs in that workspace, even if the service principal is an account admin or is a member of other workspaces.
Construct the token endpoint URL by replacing
https://<databricks-instance>with the workspace URL of your Databricks deployment:https://<databricks-instance>/oidc/v1/token
Use a client such as
curlto request an OAuth access token with the token endpoint URL, the service principal’s client ID (also known as an application ID), and the service principal’s OAuth secret you created. Theall-apisscope requests an OAuth access token that can be used to access all Databricks REST APIs that the service principal has been granted access to within the workspace that you are requesting the token from.Replace
<token-endpoint-URL>with the preceding token endpoint URL.Replace
<client-id>with the service principal’s client ID, which is also known as an application ID.Replace
<client-secret>with the service principal’s OAuth secret that you created.
export CLIENT_ID=<client-id>
export CLIENT_SECRET=<client-secret>

curl --request POST \
--url <token-endpoint-URL> \
--user "$CLIENT_ID:$CLIENT_SECRET" \
--data 'grant_type=client_credentials&scope=all-apis'
This generates a response similar to:
{
  "access_token": "eyJraWQiOiJkYTA4ZTVjZ…",
  "token_type": "Bearer",
  "expires_in": 3600
}
Copy the
access_tokenfrom the response.
Call a Databricks REST API
You can now use the OAuth access token to authenticate to Databricks account-level REST APIs and workspace-level REST APIs. The service principal must be an account admin to call account-level REST APIs.
You can include the token in the header using Bearer authentication. You can use this approach with curl or any client that you build.
Example account-level REST API request
This example uses Bearer authentication to get a list of all workspaces associated with an account.
Replace
<oauth-access-token>with the service principal’s OAuth access token that you copied in the previous step.Replace
<account-id>with your account ID.
export OAUTH_TOKEN=<oauth-access-token>

curl --request GET --header "Authorization: Bearer $OAUTH_TOKEN" \
'https://accounts.gcp.databricks.com/api/2.0/accounts/<account-id>/workspaces'
Example workspace-level REST API request
This example uses Bearer authentication to list all available clusters in the specified workspace.
Replace
<oauth-access-token>with the service principal’s OAuth access token that you copied in the previous step.Replace
<workspace-URL>with your base workspace URL, which has the form similar todbc-a1b2345c-d6e7.cloud.databricks.com.
export OAUTH_TOKEN=<oauth-access-token>

curl --request GET --header "Authorization: Bearer $OAUTH_TOKEN" \
'https://<workspace-URL>/api/2.0/clusters/list'
Additional resources
Overview of the Databricks identity model
Additional information about authentication and access control