Connect to Spotfire Analyst
This article describes how to use Spotfire Analyst with a Databricks cluster or a Databricks SQL warehouse.
Requirements
-
Note
As a security best practice, when you authenticate with automated tools, systems, scripts, and apps, Databricks recommends that you use personal access tokens belonging to service principals instead of workspace users. To create tokens for service principals, see Manage tokens for a service principal.
The connection details for your cluster, specifically the Server Hostname, Port, and HTTP Path values. See Get connection details for a Databricks compute resource.
Steps to connect
In Spotfire Analyst, on the navigation bar, click the plus (Files and data) icon and click Connect to.
Select Databricks and click New connection.
In the Apache Spark SQL dialog, on the General tab, for Server, enter the Server Hostname and Port field values from Step 1, separated by a colon.
For Authentication method, select Username and password.
For Username, enter the word
token.For Password, enter your personal access token from Step 1.
On the Advanced tab, for Thrift transport mode, select HTTP.
For HTTP Path, enter the HTTP Path field value from Step 1.
On the General tab, click Connect.
After a successful connection, in the Database list, select the database you want to use, and then click OK.
Select the Databricks data to analyze
You select data in the Views in Connection dialog.
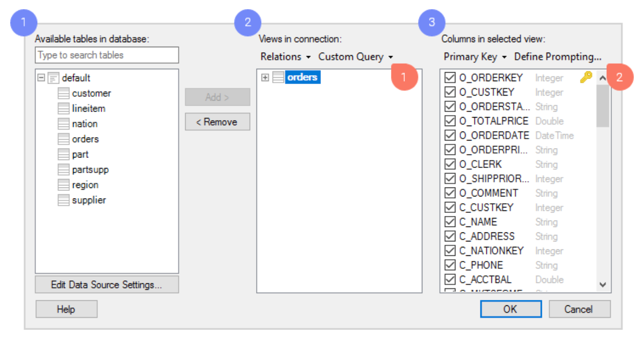
Browse the available tables in Databricks.
Add the tables you want as views, which will be the data tables you analyze in Spotfire.
For each view, you can decide which columns you want to include. If you want create a very specific and flexible data selection, you have access to a range of powerful tools in this dialog, such as:
Custom queries. With custom queries, you can select the data you want to analyze by typing a custom SQL query.
Prompting. Leave the data selection to the user of your analysis file. You configure prompts based on columns of your choice. Then, the end user who opens the analysis can select to limit and view data for relevant values only. For example, the user can select data within a certain span of time or for a specific geographic region.
Click OK.
Push-down queries to Databricks or import data
When you have selected the data that you want to analyze, the final step is to choose how you want to retrieve the data from Databricks. A summary of the data tables you are adding to your analysis is displayed, and you can click each table to change the data loading method.
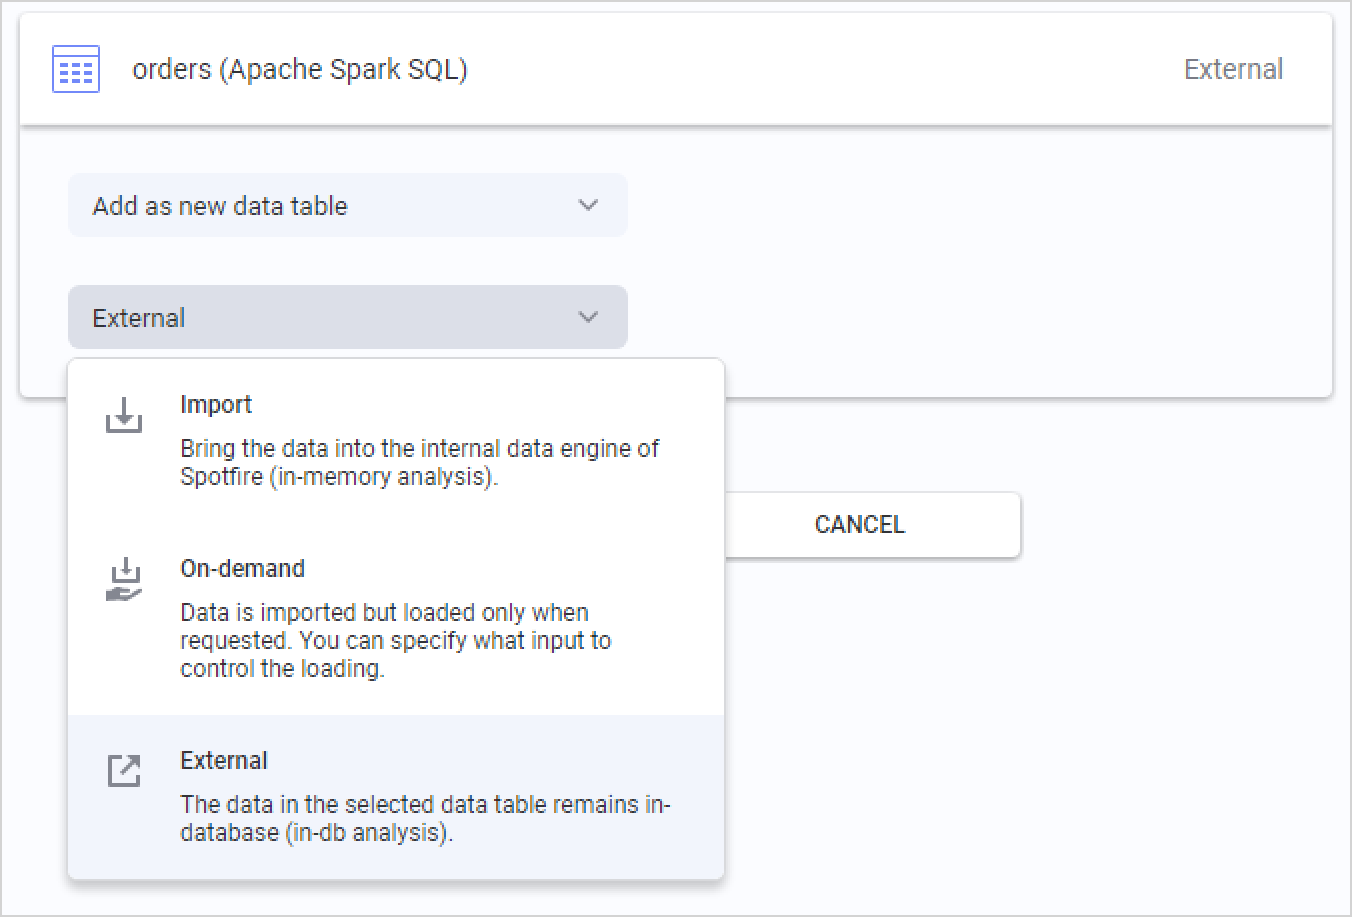
The default option for Databricks is External. This means the data table is kept in-database in Databricks, and Spotfire pushes different queries to the database for the relevant slices of data, based on your actions in the analysis.
You can also select Imported and Spotfire will extract the entire data table up-front, which enables local in-memory analysis. When you import data tables, you also use analytical functions in the embedded in-memory data engine of TIBCO Spotfire.
The third option is On-demand (corresponding to a dynamic WHERE clause), which means that slices of data will be extracted based on user actions in the analysis. You can define the criteria, which could be actions like marking or filtering data, or changing document properties. On-demand data loading can also be combined with External data tables.