Collaborate using Databricks notebooks
This page describes how to give coworkers access to a notebook and how you can leave comments in a notebook.
Note
Access control is available only in the Premium plan.
Notebook permissions
You can assign five permission levels to notebooks: NO PERMISSIONS, CAN READ, CAN RUN, CAN EDIT, and CAN MANAGE. The table lists the abilities for each permission.
Ability |
NO PERMISSIONS |
CAN READ |
CAN RUN |
CAN EDIT |
CAN MANAGE |
|---|---|---|---|---|---|
View cells |
x |
x |
x |
x |
|
Comment |
x |
x |
x |
x |
|
Run via %run or notebook workflows |
x |
x |
x |
x |
|
Attach and detach notebooks |
x |
x |
x |
||
Run commands |
x |
x |
x |
||
Edit cells |
x |
x |
|||
Modify permissions |
x |
Workspace admins have the CAN MANAGE permission on all notebooks in their workspace. Users automatically have the CAN MANAGE permission for notebooks they create.
Manage notebook permission with folders
You can manage notebook permissions by adding notebook to folders. Notebooks in a folder inherit all permissions settings of that folder. For example, a user that has CAN RUN permission on a folder has CAN RUN permission on the queries in that folder. To learn about configuring permissions on folders, see Folder ACLs.
To learn more about organizing notebooks into folders, see Workspace browser.
Code comments
You can have discussions with collaborators using the comments feature. To mention users directly in comments, type “@” followed by their username. Users will be notified of relevant comment activity though email.
To toggle the Comments sidebar, click the Comments icon  in the notebook’s right sidebar.
To add a comment to code:
Highlight the code section and click the comment bubble:

Add your comment and click Comment.

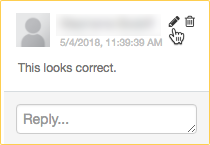
To edit or delete a comment, click the kebab menu and choose an action.

 at the top of the notebook. The Sharing dialog opens, which you can use to select who to share the notebook with and what level of access they have.